Chances are you’ve deleted files from your computer before. With lots of information and limited space, it’s important to keep unneeded files and info off your computer so it can run as smoothly as possible.
When you delete a file, whether on purpose or on accident, you might be interested to know that it’s not necessarily gone forever. In fact, when you delete items on Windows 10, they are often moved to your computer’s Recycle Bin.
In this article you will learn how to properly delete files on your computer and also how to recover files you deleted. If this task turns out to be too difficult for you then consider reaching out to HelpCloud’s hourly tech support service, HelpCloud Technician by-the-hour:
How to Delete
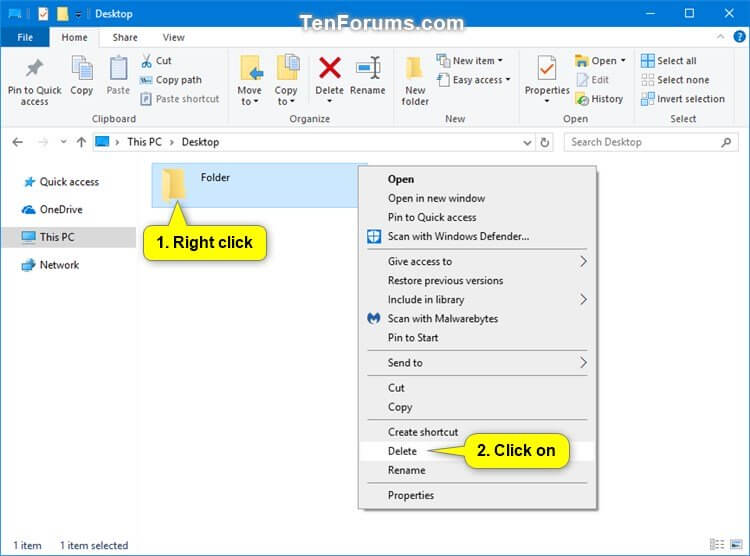
The most straightforward way to delete a file or folder is to right-click on its icon or name. A pop-up menu will populate, and it should present you with a “Delete” option. For many files and folders, right-clicking and then deleting is the quickest way to clear the information.
Another quick option that some users like is to click the object that needs to be deleted and then hit the “Delete” key on the keyboard. You may also drag and drop the file or folder into a “Trash” or “Recycle Bin” icon.
Unable to Delete?
One common reason users are unable to delete a file is that it’s open in another program. Once you are no longer using the file in said program, you should be able to delete it without issue.
Important files are also hard to delete There are some files and pieces of information that help your computer run, so you don’t want to delete them. If you see a little gear in a file’s icon, it might be one that shouldn’t be deleted.
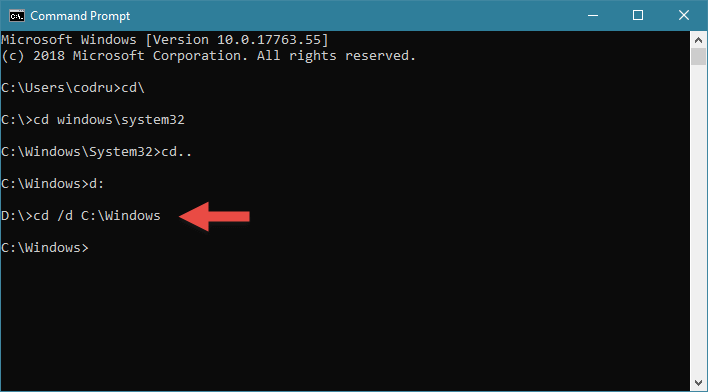
If for some reason a file still won’t delete and you are sure it should be erased, right-click on it and then select “Command Prompt” from the drop-down menu. A new window will open, and you will type in “cd /d;” while the window is still open, right-click the object you’re trying to delete a second time.
Scroll down and select “Properties.” Copy the location of the file and paste it after the text you added that reads “cd /d.” Press the “Enter” key and type “dir /x” and hit the “Enter” button again.
A list of code will populate, and you will look for the line that says <DIR>. If the folder is titled “Old Photos,” the DIR might read something like “OLDPHOTOS~1.” Type “rmdir /1 /s [name of folder] and press enter. At this point, the folder should delete.
As always, if you are having any kind of difficulty recovering deleted files on Windows 10, please consider reaching out to HelpCloud Technicians for remote support.
Recovering Deleted Files
The first thing to do when you want to retrieve a deleted file is to look in your computer’s “Recycle Bin.” You can open this folder from its desktop icon. If you can’t find the icon, open “File Explorer” by simultaneously pressing the “Windows” and “E” keys on your keyboard. There is also generally a File Explorer shortcut displayed on the taskbar.
Once Explorer is open, press the “>” icon. A list of all desktop applications should come up, including “Recycle Bin.” You may also type “Recycle Bin” into the search menu and then press “Enter” to open the application.
Within the “Recycle Bin,” you should see items you’ve recently deleted. Once you find the file you want to recover, drag it from the bin back onto your desktop. If you can’t find the file you want to recover, there are some other things you can try.
If you’ve been running regular backups and have File History Backup enabled, you can restore files from your history. Type “Restore Files” into the search box on your taskbar. Next, select “Restore your files with File History.”
You may see several versions of the file you want to recover. Once you’ve found the version you’re interested in (generally the most recently saved), right-click it and then select where on your computer you’d like the file to be restored and saved.
If you haven’t been running backups, you will benefit from a membership with HelpCloud Tech Support, which includes daily backup of user files in the cloud with HelpCloud’s partner company, iDrive. You should also start running regular backups yourself.
To backup your Windows 10, you’ll first need an external hard drive.
After you’ve plugged your hard drive in, click “Settings” and “Update & Security.” Under “Backup,” you can add a new drive. If your external hard drive is already established, make sure you turn “Automatically back up my files” on. If you don’t want to backup automatically, click “More options.”
Here, you can select when you want to backup. The most you want to backup is daily, as anything more frequent can cause your computer to work slowly. Finally, push “Backup now.”
Permanently Deleting Files
It’s nice to know that when you accidentally delete a file, it’s not gone forever. What if you’re interested in permanently removing a file, though? For example, say you’re selling your computer and you don’t want the new user to have access to any of your information, how do you accomplish this?
Windows 10 has a built-in feature called “Cipher” that can help you delete files securely.
To start, make sure the file or folder you want to delete has been moved to “Recycle Bin.” Then, empty your recycle by selecting the files and holding the keys “Shift” and “Delete” at the same time. If you haven’t moved the info to the bin already, it can’t be erased by Cipher.
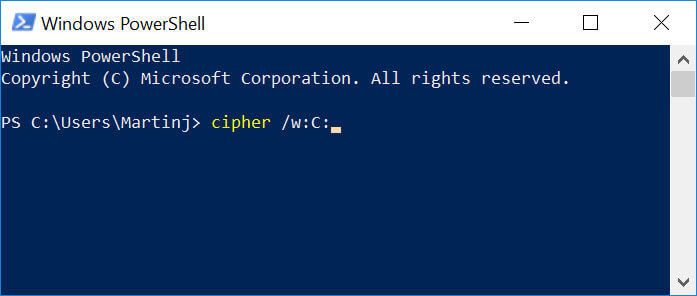
Right-click on your Start menu and select “Windows PowerShell.” Type “cipher /w:C” into the window that opens. After you enter these letters and characters, the computer will overwrite the data that you’ve deleted. After you enter the command, depending on how much info you have in your trash, deletion may take several minutes.
Recovering Permanently Deleted Files
If you can’t find the file you want to recover in “Recycle Bin,” you may still be able to find the file. Even if you’ve emptied the recycle bin, there are several applications online that can help you restore deleted files.
Before you download one of these programs, you’ll want to touch base with a computer support company to ensure you’re using an application that will not give your computer a virus or steal your information.
Is Windows 10 Deleting Data Without Your Permission?
Occasionally, a user will lose data without his or her consent. If you find that any of your information is missing without your deletion, a faulty update might be to blame. Review your recently installed updates and see if any are associated with bugs. If so, you can delete the update and wait for another download to be released where the bug has been resolved.
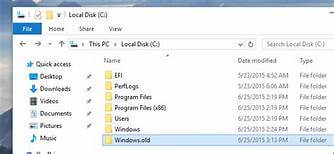
If you’ve recently upgraded Windows 10, rest assured that all of your previous info should be stored within a folder named “Windows.OLD.” You can go through this drive to revive information that was mistakenly deleted.
On the topic of Windows updates, a new version was made available in November of this year (2019). The update’s focus is on performance and quality, so there aren’t many new features. Still, there are a few that are worth familiarizing yourself with if you haven’t already.
The first new feature can be found in the “Start” menu. The navigation window within the menu now expands automatically and is more user-friendly than before. The calendar has also undergone some helpful updates.
It’s possible to add events to your calendar right from the taskbar. The Windows 10 search feature has also been updated with advanced indexing options. Search will now also show website information and page suggestions using the files you’ve saved on your device and in the cloud.
Getting the Windows 10 November 2019 Update
If you haven’t already, now’s the time to download the update. Click on your “Start” menu and select “Settings,” “Update & Security,” “Windows Update” and “Check for updates.” If an update is available, you will want to download and install the update. If your device is already running version 1909 of Windows 10, it’s up to date.
The last major update was in May of 2019, and if you haven’t yet used this update, it might take a fair amount of time to update your system. However, if you’re already running the May update, updating to the November update should be relatively quick and easy.
File Recovery
Losing something or accidentally deleting something you need is nothing shot of annoying. Luckily, with Windows 10, even if something is moved to the trash, there are normally several ways it can be recovered.
That said, finding deleted files can pose its own problems. If you are still struggling to find the information that should be present on your laptop or desktop, a computer support company can help. Although the techniques listed in this article are useful, they are by no means exhaustive. Companies with advanced customer support will have more tips and techniques to help you recover the information you need.
If you are having any kind of difficulty recovering deleted files on Windows 10, please consider reaching out to HelpCloud Technicians for remote support.
HelpCloud uses trusted, advanced software that helps technicians resolve your issues or instruct you on how to make sure your computer is running properly. Technicians can even offer a free diagnosis to help you know what might be required to resolve your issue.


