How to Deactivate or Activate Those Permissions
Privacy is a hot topic in the modern world, especially when it comes to technology. Many computers come with cameras and microphones installed. It is possible for a criminal to hack your microphone or camera.
With this access, he or she can exploit your most sensitive moments and information.
That being said, these devices are installed for a reason. Without them, you couldn’t make precious video calls to your loved ones and use many other helpful applications. Users need to take advantage of these technologies, not the other way around. Fortunately, there are a few ways to protect yourself and your sensitive content.
If, after reading through this tutorial, you are unable to perform these tasks on your own then consider reaching out to HelpCloud Technician by-the-hour and let professional technicians do the work.
macOS Mojave
Your Apple computer might have a built-in camera and microphone.
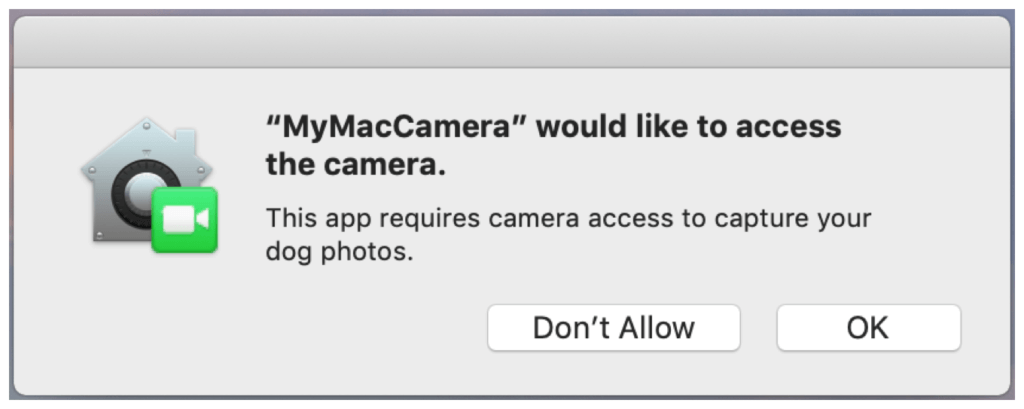
Although these are needed for some applications, your computer should inform you and ask for consent before powering either on for use. Every time an app wants to use your camera or microphone, it should explicitly ask for your permission.
To adjust how your computer uses your webcam and microphone, open “System Preferences” from the “Apple” menu. Under “Security & Privacy,” click “Privacy.” You can then click on the microphone permissions. Everything listed with a tick mark next to it has access to your microphone and camera. To disable, un-tick the corresponding boxes.
Another important thing to research is whether or not you want to physically cover your computer’s camera with an object. If you look online, there are many stickers, plastic slides and other obstruction devices meant to cover up your camera. Users do this because they are concerned a hacker will access the computer’s camera. Computer users don’t want to be spied on, especially by criminals.
You might be wondering if Apple does anything more to protect your data when it comes to your microphone and camera. There is something called ARM coprocessors that Apple uses to boost security. The T1 and T2 ARM-based coprocessors help protect your Touch ID, Apple Pay, microphone, camera and more.
Windows 10
Many PC computers come equipped with cameras and microphones.
When an application is using your microphone, a microphone icon should display on your system tray. The system tray shows you different notifications and alerts from your computer. If you hover over the microphone icon with your cursor, it will tell you which app or applications are using your mic.
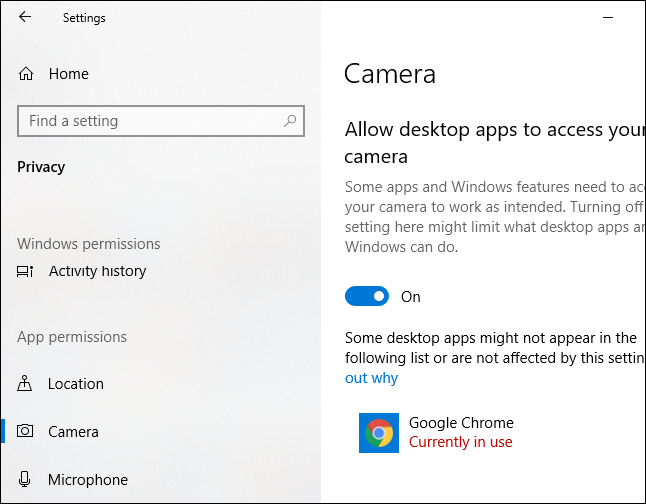
For more information, you can click on the icon. A pop-up window will populate. Scroll down until you see the “Currently in use” section. Here, you will have access to an on-and-off toggle. You can click the toggles to either direction to choose which apps you’d like to use your microphone.
Another way to manage this setting is through the main menu.
Under “Settings,” click “Privacy” and “Microphone in Windows 10.” Here, you will be able to see the microphone settings. Looking through the list of applications you can learn more about what systems have been accessing your microphone. There is a “Last accessed” date and time feature that will inform you of what applications have used your microphone in the past.
Microsoft tried to protect its users, but there is only so much the company can do. While you’re on the internet, an app can bypass Window 10’s privacy settings. It is possible for an app to use your microphone and not be listed within the system tray.
To avoid this, only download trusted applications. Knowing what is and isn’t safe can be difficult, though. If you are having any kind of trouble with Windows 10, whether security-related or not, strongly consider reaching out to HelpCloud Technicians for support.
Camera-Specific Advice
It’d be an oversight not to discuss how to protect yourself from camera and microphone hacking. As mentioned earlier, hackers can look through the camera on your computer.
If you have a home security system or any other camera connected to your network, a hacker can spy on you in various ways. They can also tap into your microphone to listen in on your activities.
Security software is available that can help protect you against webcam hacking attempts. Generally, you’ll want to pick a paid software option. Free offerings might work, but they can also lack the funding to keep up with current threats. In the past, some free software downloads have actually given computers the viruses they were designed to avoid.
If you’re wondering how your webcam can be hacked in the first place, chances are malware is to blame. Malware is a bad software that can be a type of virus. It’s common for users to unknowingly download a virus. Once the virus is on your computer, hackers can gain control of your device.
At all times, it’s useful to be aware of your camera indicator light. If the light turns on and you’re not using an app that’s asked for access, your camera might be hacked. Of course some hackers will disable the light, but not all will do so.
Avoiding Mic and Camera Security Threats
There are several other ways to protect yourself from mic and camera vulnerabilities. One good way to do this is to keep your software updated. New versions improve the security and overall performance of your computer.
On an Apple computer, you can update by clicking “System Preferences.” Under “Software Update,” check for available downloads and install them when they populate. PC owners can open their browser and click “Windows Update.” They will be given the option of “Microsoft Update” if one is available.
Another safeguard is to secure your WIFI connection.
A criminal can gain access to your network through your router. Once access to your router is breached, a hacker can access your bank accounts, emails and more. To secure your WIFI, make sure your router name and password are unique and hard to crack. You will also want to update your router as often as updates are available.
A firewall can also protect you from potential threats. A firewall is a computing system that blocks unauthorized access. Your PC or Apple computer likely already has a firewall installed. Still, there is a possibility that the firewall is turned off.
On an Apple computer, go to “System Preferences,” “Security & Privacy” and “Firewall.” The “Turn on Firewall” or “Start” should be selected so the firewall can be configured. On a PC, you can access the firewall through the “Start” menu. Within “Settings,” click “Update & Security,” “Windows Security” and “Firewall.” You will then select your network and turn on the firewall.
Applications of Benefit
One of the most popular Apple applications that uses both the camera and the microphone is FaceTime. FaceTime is a free technology that uses WIFI or cellular data to connect devices. This application allows you to chat face-to-face with someone when you can’t be with them.
To use FaceTime on your computer, open the FaceTime app. The first time the application opens, you may need to give it permission to turn on. Next, you’ll log in with your Apple ID and password. To make a call, you must be logged in. The person you are trying to call must also be logged into his or her FaceTime.
When placing a call, search for the contact within FaceTime. As long as the recipient is in your contacts list, he or she should come up in your FaceTime search. If you can’t find the person you’re trying to call, you can manually enter his or her number or email address.
When you’re ready, click the video camera icon. To call with audio only, press the phone icon. The person you are calling will then see a notification pop up, alerting an incoming call. The person can see it’s you calling them and he or she can accept or decline your call.
After you’re connected, you might find that it’s hard to see the person through the small FaceTime window that populates. To enlarge the picture, click on the green circle in the top left-hand corner of your window. The image will then fill your entire screen.
Another thing that might make viewing difficult is your picture-in-picture window. There is a small window where you can see yourself. If your window is in a place that’s inconvenient, you can move it by clicking the window and dragging it somewhere else within the larger FaceTime window.
There’s no easy way to use FaceTime on Windows, but there are many applications that can stand in FaceTime’s place. Skype is a popular FaceTime replacement that works on a variety of platforms.
After you download Skype for Windows, launch the application on your PC. You will then need to create or enter your Skype account’s information. As soon as you’re logged in, you can search for friends and family. To search, enter someone’s email, real name or Skype name.
When you’re ready, click on the contact you want to call and select the camera icon. During your call, you can also text chat if you see fit. The text field is in the top right-hand corner of the call window.
Stay Aware
You have to take the bad with the good when it comes to using your computer’s microphone and camera. While taking advantage of all these technologies have to offer, it’s also important to stay safe.
If you are having any kind of difficulty using macOS or Windows 10, whether mic-related or not, strongly consider reaching out to HelpCloud Technicians for remote support to help you resolve the issue.


