Smartphones are one of the most ubiquitous devices inthe developed world. Over 2 billion people own one, andthe United States is one of the leaders of this, with seventy-seven percent owning asmartphone.
Android is the most common operating system used on smartphones, with 75 percent of the market using it. The operating system is basically the type of smartphone, and the two main competitors are Android (used by Samsung and most other smartphone manufacturers) and iOS (used by Apple for the iPhone). Both operating systems work well and perform similar tasks, so which one you use usually comes down to personal preference.
If you’ve just recently purchased an Android smartphone, youmay be wondering where to start. If you’ve never used one before, it can be a bit intimidatingtrying to get it set up. With any phone, you have calling and text messagecapabilities already out of the box. But the next most important and commoncommunication method is email, and that requires a little more work.
Email has been around since roughly 1971, and it’s one of the main reasons theInternet originally got popular. You’ve probably used it to stay in touch with family,friends or coworkers, and now you can carry it around in your pocket.
So just what does it take to get email set up on your Androidsmartphone?
Once you’ve got email set up, you can send and receive messageswith text, pictures, file attachments and more, just like you could on acomputer. And you’ll have itwith you wherever you go. It’s really notas hard as you might think, and we’re going towalk you through step by step.
The example machines that we used for this article are a computer running Windows 10 and a Samsung Galaxy S8 Plus phone. If you’re on something different, the wording or the icon might look a little different, but the process will be identical for whatever Android smartphone and Windows computer you have—let’s get started!
1) Open Email App
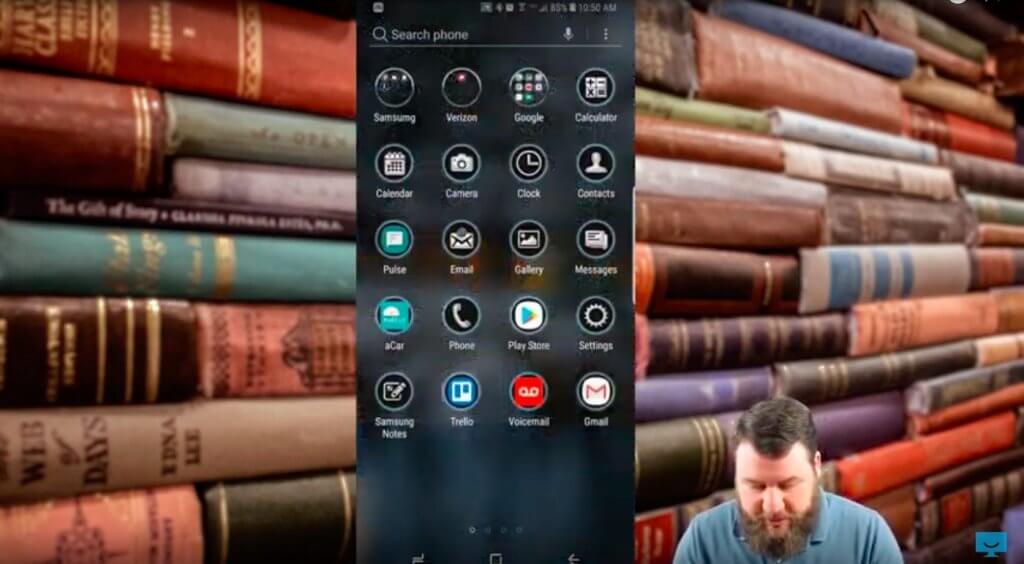
First you need to find your email app. On ourexample Samsung phone, the easiest way to do that is to look at all your appsby swiping up. You may need to swipe left and right on your phone to find theapp, but it should not be hard to find.
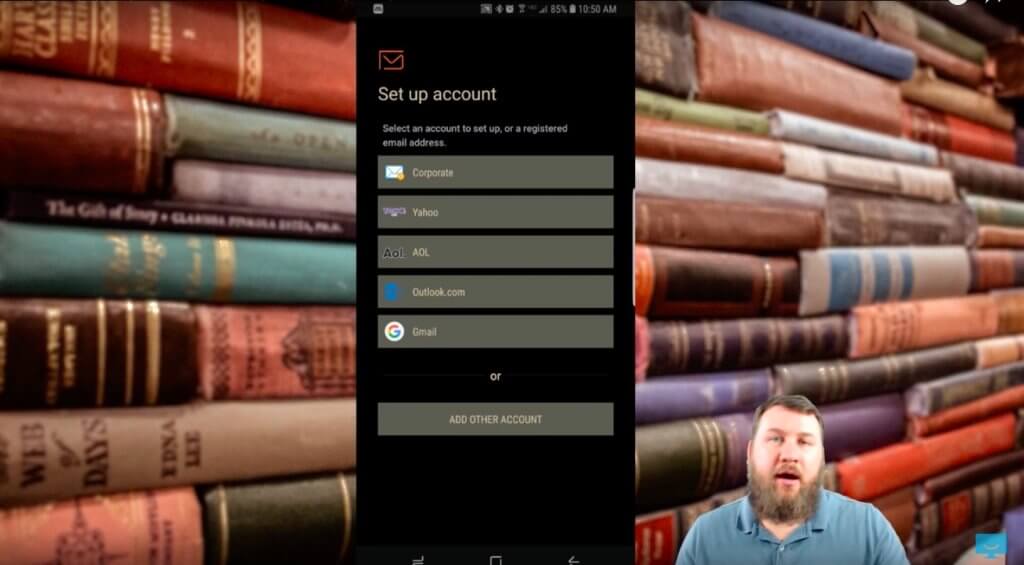
Tap on that icon once and it will bring you to amenu of all the different accounts that you can use to set up your email. Thereare a few options here: corporate accounts, then a few different providersincluding Gmail, Yahoo, and AOL.
Different providers will have different details,but the process is still basically the same. Some of them have their own appsthat you can use for email as well, with the most notable being Gmail.
If you want to use the Gmail app, the process isalso simple but will be different, and we’re not concerned about it today. We’re using the regular emailapp.
2) Enter Your Details
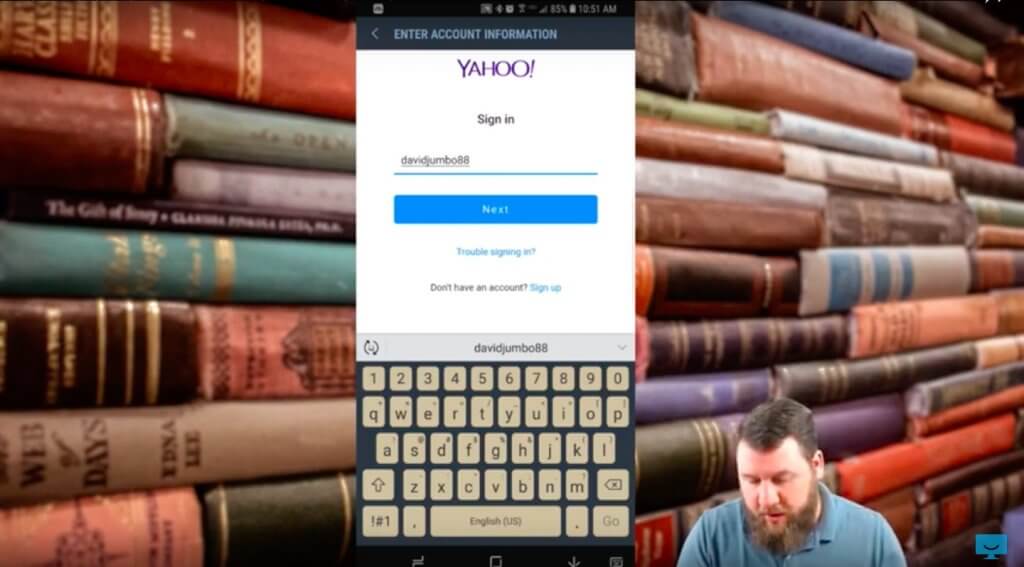
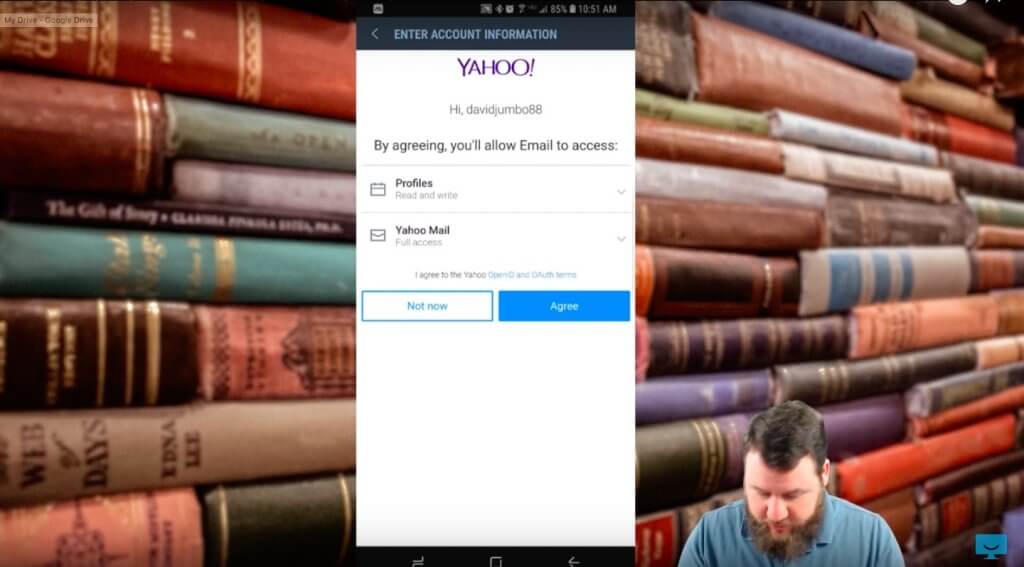
For our example, we’re using Yahoo, which is acommon email provider that you might have. We tap the Yahoo option and aretaken to a login screen. Make sure you have your username and your passwordhandy, as this is where you’re going toenter them. Phone keyboards can be a little finicky sometimes if you’re not used to them, so itpays to be careful when you enter in your username and password so you don’t have to enter them a secondtime.
If you don’t have an account, this is where you’d set one up. You can tap the “Sign Up” link and it will take you toanother screen where you can create one. Most people have an email account,though, and for the purposes of this tutorial we’ll assume that you do as well.
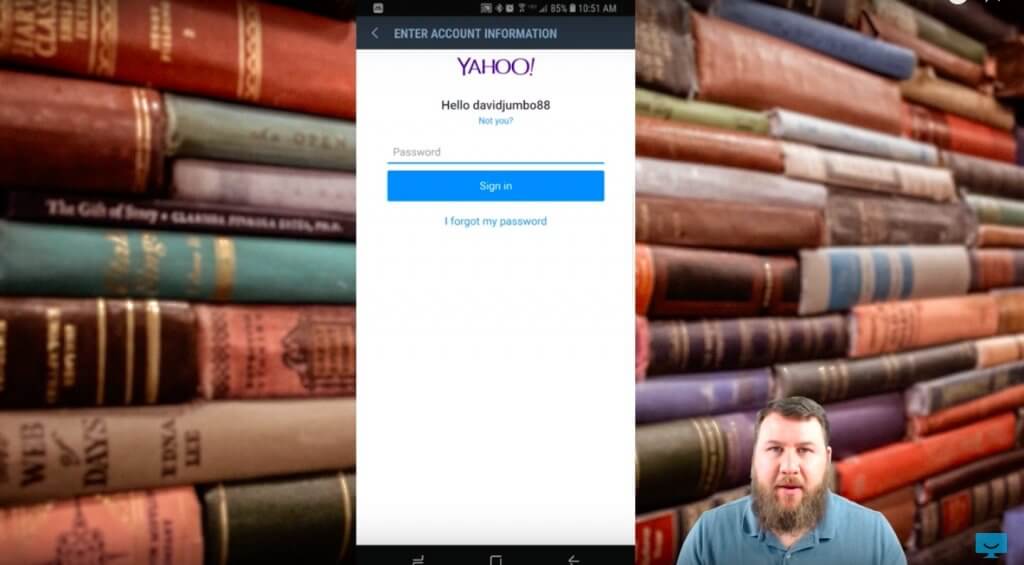
Once you’ve entered your username, it will prompt you for yourpassword. If you’ve forgottenyour password, there’s anotherlink you can tap that will take you to a screen where you can enter someinformation and recover it. Your phone will save your password for you so youdon’t have toenter it every time you open your email, but you need to enter it once so itknows that you’re who yousay you are. Then hit the “Sign In” button.
One thing you need to know: if you do decide tochange your password at any point, your phone will ask you to enter the newpassword to access your email.
3) Agree
Your phone will want to ask you if you’re willing to grantpermissions to this app to access your email. Just hit “Agree”. It’s a formality to make surethat you know what your apps are permitted to access. You’re basically giving the app onyour phone a spare key to your email, and just like you would with your home inreal life, you only give that to someone you trust.
4) Initial Setup
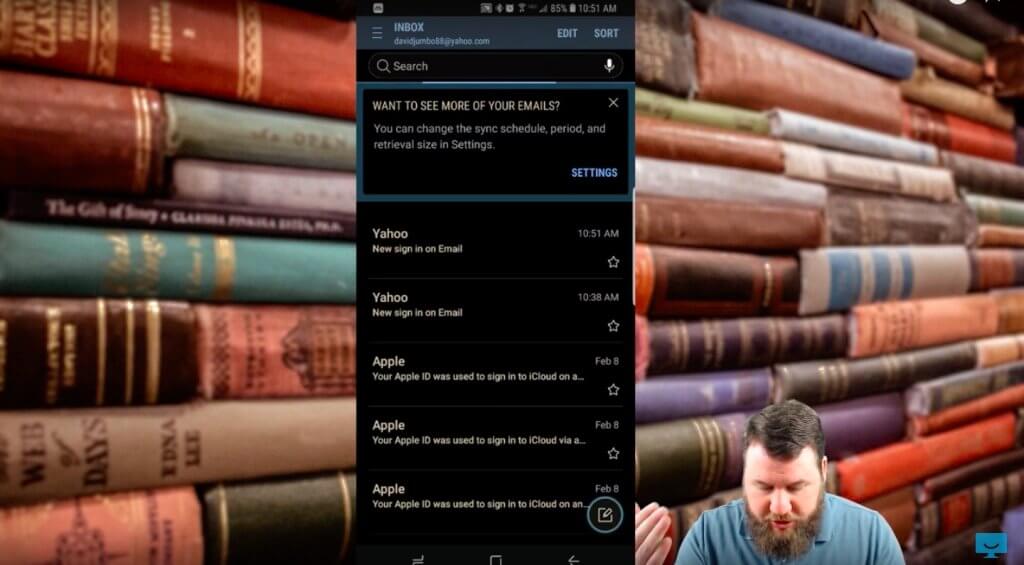
Your smartphone will now talk to your emailprovider, check settings, and begin the process of syncing your email accountwith your phone. It will then take you to your inbox, the main folder of youremail.
It may take a minute for emails to actually showup as your phone downloads them, depending on the speed of your connection tothe server. Your phone will usually keep the most recent emails on hand so youcan access them offline, even if you’re out of service range. All the rest of your emailsare accessible but not necessarily stored on the phone.
At this point your email will give you a bigbanner at the top of the screen that says you can change your account settingsif you want to. If you want to mess with your settings, tap the “Settings” button, or if you just want toleave your email the way it is you can hit the “X” in the top right corner. Thebanner will disappear.
You can still access your settings through themain menu if you need to, as we’ll see in aminute. But now your email is fully set up and should be synced with yourphone. You’re ready togo!
5) Basic Email Functionality
Once you’re at this point, you have the full functionality ofyour email account. You can send and receive messages, create folders, checkyour emails and see if any new ones have come in, and more.
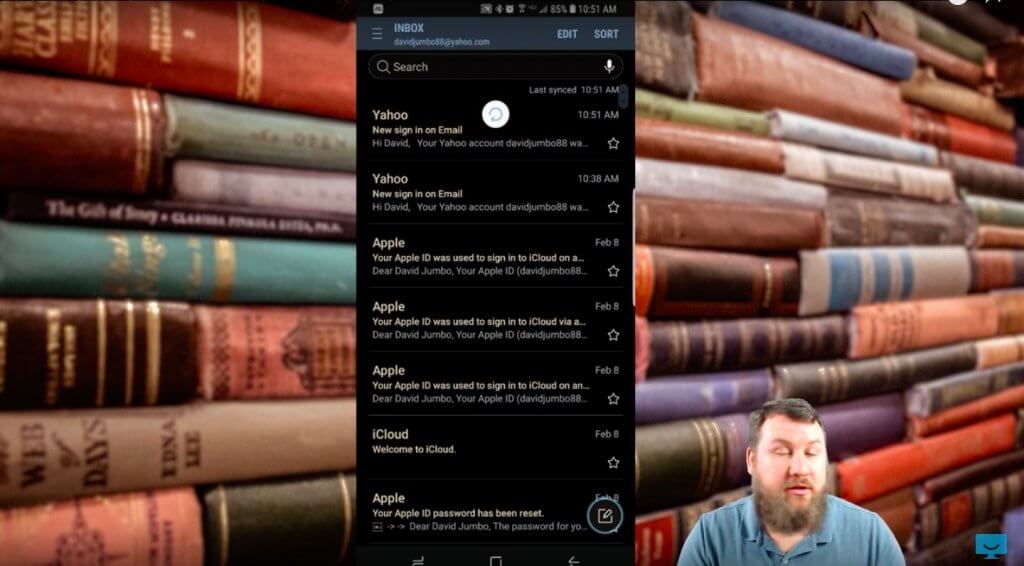
If you want to check for messages, swipe downuntil you see an icon that looks like a revolving arrow, then release. Youremail app will check to see if anything new has come in.
At the top right of the screen you can see thelast time your email app checked for new messages.
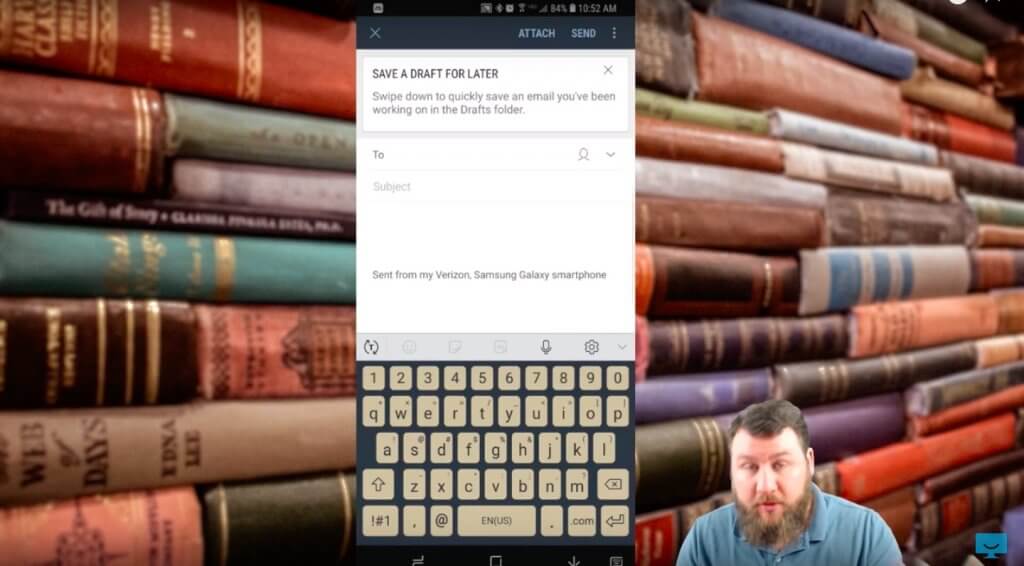
If you want to send an email, there’s a small icon at the bottomright of the screen that looks like a notepad or sticky note with a pencil. Tapon that and you can open the screen where you can create an email to send tosomeone else.
On this screen you can fill in the email addressyou’re sendingto, the subject, and the body of the message. There’s a default signature in therethat you can delete if you want to. If you decide you don’t want to send the email, youcan tap the “X” in the topleft corner and the app will ask you if you want to delete it or save it as adraft to send later.
If you want to add another account, you canclick the three little bars in the top left corner of the main screen. Thatwill slide out a pane from the left side that has all your menus.
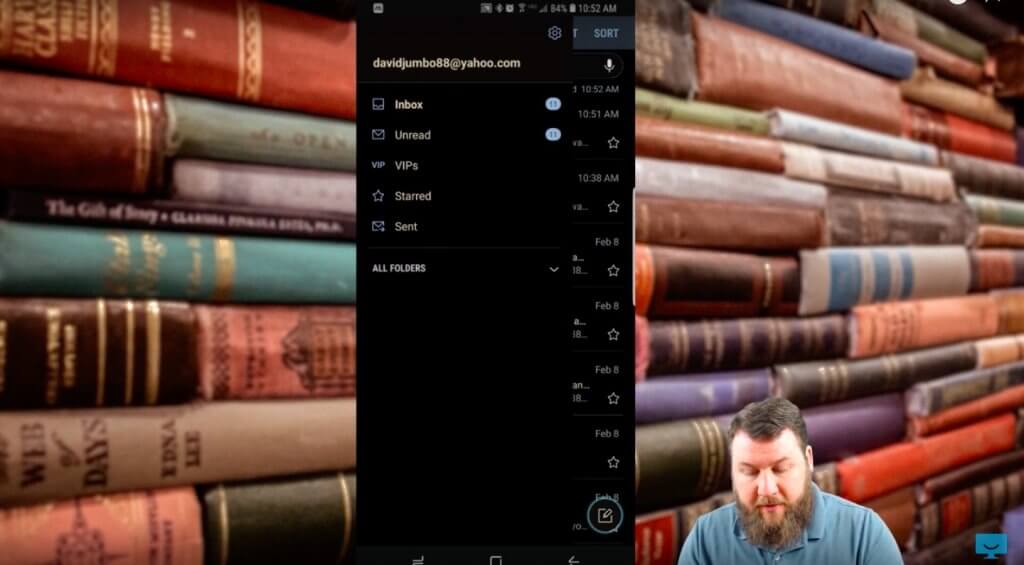
There’s a little gear in the top right of this pane thatleads to your email settings. This is where you can adjust everything about howyour email app works. You can click “add account” up at the top of the Settings menu and it will takeyou to the menu at the start so you can do the process all over again.
If you want to add more folders, you can tap “all folders” in the main menu to get toyour folders. There’s a button atthe bottom that will say “addfolder”. You might have to scroll down to get to it, depending on how manyfolders you already have.
Setting up email on an Android smartphone may seem like an intimidating task, but it’s really not too bad. If you’re having trouble, though, feel free to reach out to HelpCloud for a hand. HelpCloud can connect directly to any Android smartphone and help you get things set up if you need it. That’s it. You’re done! Now you’re ready to go send and receive email messages from friends, family, coworkers, and more.
