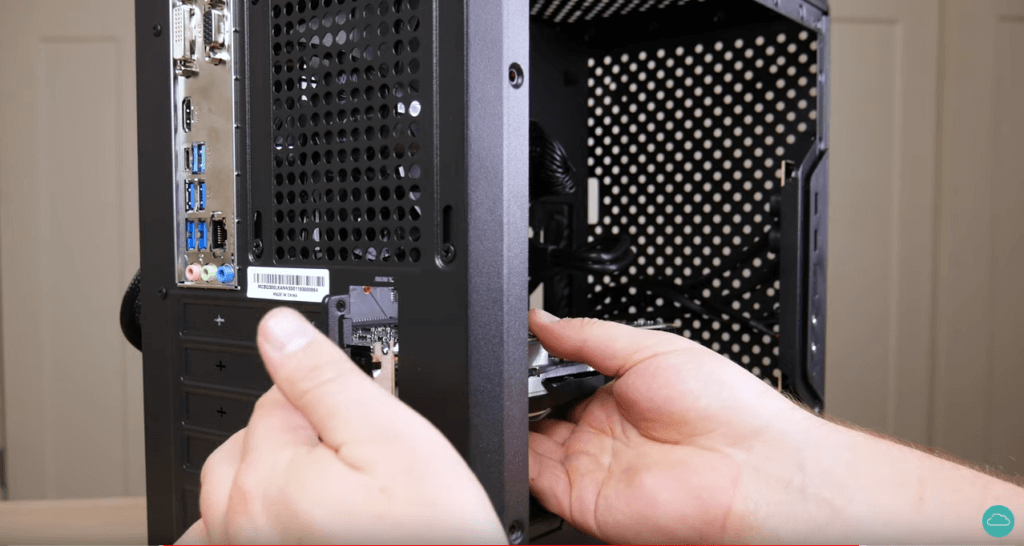
If you’re a PC gamer, you’ve probably felt the pull of building your own rig.
The first time you start to get choppy frames in a Destiny Crucible match or see the textures pop in on the latest Call of Duty, you’re likely to start daydreaming about building your own system. You can mix and match the parts, customize it to your own specifications, dress it up so it looks cool … what’s not to like?
But actually getting into PC building can be daunting. There’s a dizzying array of components to choose from, and if you’ve never actually built a computer you might be intimidated by the sheer wave of jargon that floods you the moment you browse Newegg, Amazon or Tiger Direct.
It’s not nearly as hard as it seems, though. With a little bit of planning and preparation you can build a gaming PC that will run all your favorite games. Even if you’ve built a PC before, there are some tips and tricks that will help make it easier.
Before You Start …
You’re going to need a few tools to start with.
First you’ll need a small Phillips head screwdriver, for undoing all the case screws. You might want a flathead on hand just in case too, but most case screws these days are Phillips.
Needle nose pliers or tweezers may come in handy for tight spaces, especially if your case is cramped. If you lose a screw or need to plug in a connector in an area you can’t quite reach, they can come in very handy.
Zip ties are always handy for cable management and keeping things out of the way. Keeping a few of varying sizes on hand is always a good move.
You’ll need an internet connection and a nearby outlet with power, too. And you’ll need something to install Windows OS with. You could install another operating system like Linux, too, but it doesn’t have anywhere close to the gaming support that Windows OS does.
Your best bet for an install is a USB stick loaded with Windows, but a CD drive will also do the trick. You can get one from an older computer (if it has the right connections) or just buy one for a couple of bucks online.
A monitor, keyboard and mouse are important as well for your initial setup, even if they aren’t the ones you want for your final build. Make sure the mouse and keyboard are USB, not the older round PS/2 connections.
For your final build, you’re going to want a higher-quality gaming mouse and keyboard if you can get your hands on them, and if you have the money, you might consider a mechanical keyboard, which has more precision and more customizability.
Static electricity can fry components if you grab them with your bare hands, but the risk is often overstated. Many components these days are fully enclosed, and if you take a few basic precautions your chances of ruining something are extremely low.
Unless you’re building your computer on shag carpet while wearing wooly socks you’re probably fine, but to be on the safe side you should do your build somewhere uncarpeted. If you have a table in a room with wood or tile on the floor, it’s ideal.
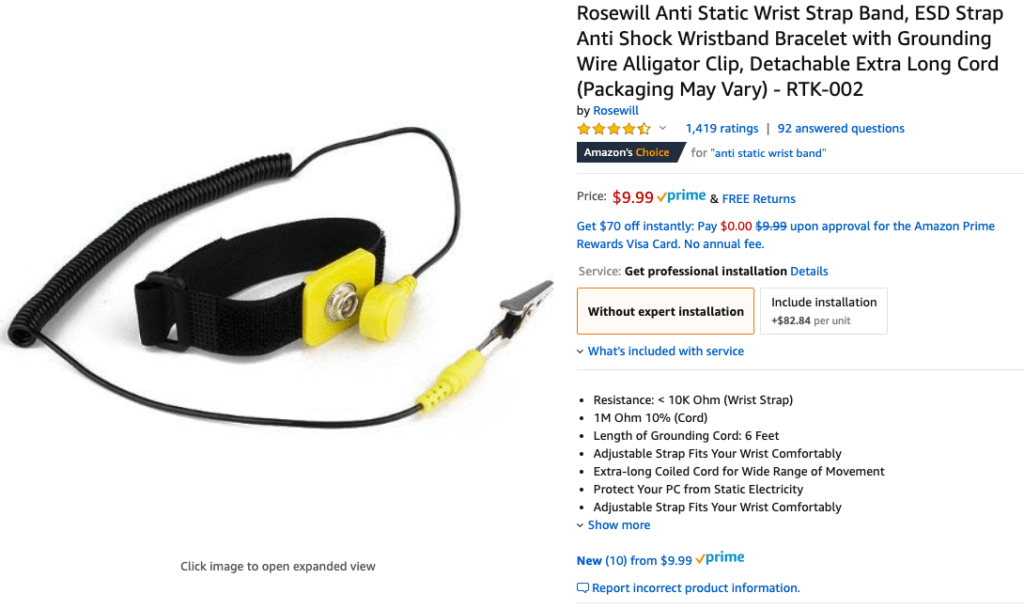
If you’re really worried about electrostatic discharge you can buy a cheap antistatic wristband that will keep you grounded. Clip it to the case and work as normal. Or if you don’t want to bother, just touch the case every now and then to keep yourself grounded.
Once you know you have your tools and your workspace, it’s time to look at the build.
There are several components to a successful gaming PC build, and depending on what games you like to play you may need to invest more in one or another. Generally speaking, though, there are two major components that matter for gaming: processor and graphics card.
The Foundation of Your Gaming Build
A video game is fundamentally about what you see on the screen, and the processor (or CPU, for Central Processing Unit) and the graphics card (or GPU, for Graphics Processing Unit) are the two elements that have the most to do with how this happens.
Early computers did all of their image processing through their CPU, but as time went on and graphics became more advanced it became essential to offload this to another specialized processor. This logic board, the GPU, handles turning instructions into smooth, well-rendered 2D and 3D images.
The CPU comes into play mostly for games that involve a lot of elements on screen at the same time—high-graphics MMO shooters like Destiny, strategy games like Total War or Civilization, or simulation games like Cities: Skylines or SimCity.
Any time there’s a lot of action happening with many discrete elements, the processor is under strain. This Total War screenshot illustrates a heavy strain on the player’s CPU, with many individual elements being rendered and tracked both on screen and off.
GPU is important for just about every game, barring some old-school 2D-style games or relics like World of Warcraft. If you want to generate smooth water or fire effects, rain, snow, particles or high-grade textures in any context, you need a good GPU.
The problem with GPUs is that because they’re good at high-volume parallel calculations, they’re extremely good for mining cryptocurrency like Bitcoin and Litecoin. That’s driven the price through the roof in the last several years, though prices are starting to settle a little. If you want a good GPU, be prepared to pay for it.
With these being the fundamentals of your build, though, they’ll more or less determine the caliber of machine you have. Other components matter, but your CPU and GPU will be the main bottlenecks that determine just how good of a gaming machine you can make.
Choosing Your Components
The processor is the most important part of your build, and there’s a dizzying array of options here. The two main brands to choose from are Intel and AMD, with Intel being the market leader.
AMD’s Ryzen line will be what you want in a gaming PC, with the Threadripper being the high-end option if you have money to burn. The newer Intel i5 or i7 processors are the best choice for Intel processors, with the exact spec again depending on the money you have to spend.
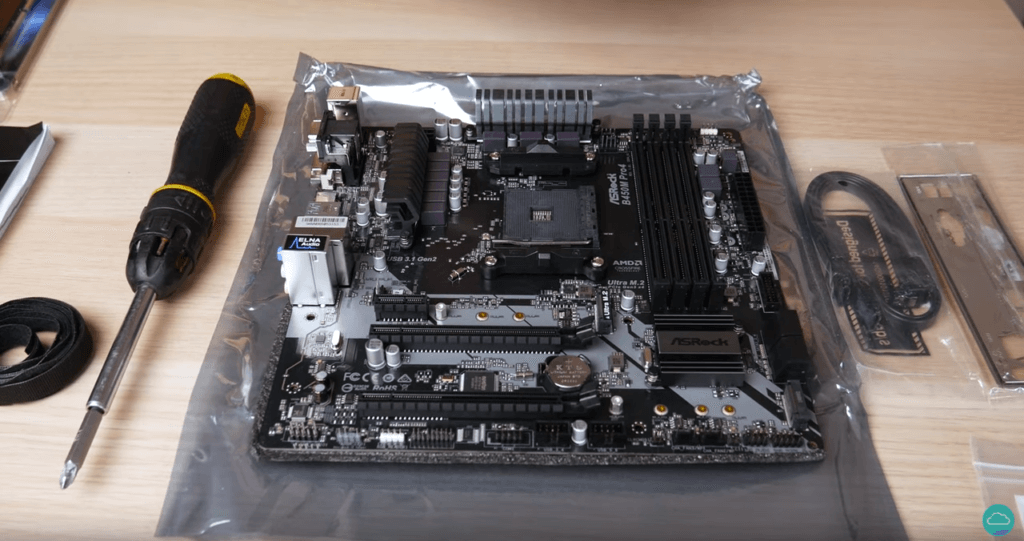
Something like PC Part Picker will help you keep everything compatible, as your processor will determine which motherboard you can use. Your motherboard is the main circuit board in the machine, and the one all your components plug into. Cheaper boards have less options. Higher-end boards can support overclocking, which is only recommended if you’re already comfortable building PCs.
Overclocking allows you to increase the clock speed of various components so they run faster, but there’s also a commensurate increase in heat, and if done to extremes you can destroy some of your components very easily. Better motherboards may also have more slots, lighting, and extra connectivity. Just make sure you get one that fits your CPU.
Your GPU will probably be your most expensive component if you’re building a gaming PC. You don’t want to skimp here. Even if your board says it has integrated graphics, it doesn’t matter. You can’t really game with an integrated graphics card, at least not if you care about having actual graphics that run with any sort of speed. Integrated graphics cards lean heavily on the system’s CPU to pump out their graphics.
RAM, or Random Access Memory, is your computer’s short-term memory. As a rule of thumb you can never have too much. Speed matters, but amount matters a lot too. 16 to 32 gigabytes will carry you through pretty much any gaming you care to do.
Your long-term storage, or hard drive, will probably be a solid-state drive instead of the old platter-based drives. Solid-state drives are more or less large flash memory cards like you use in a camera, and they offer much higher speed than older physical drives.
Many people run two drives: a smaller SSD for operating system and essential files and a larger traditional hard drive for the rest. SSDs are more expensive than HDDs, but if you have the money more solid-state is never a bad thing.
Cases have a lot of options, but generally any case will work unless you want to get into something advanced like water cooling. Make sure you have space for an extra fan or two.
A power supply unit, or PSU, is the component that supplies power to your whole build. Most simpler builds will run on just about any PSU, but it’s worth doing a little homework, especially if you’re using a high-end graphics card …
Those are heavy power sinks.
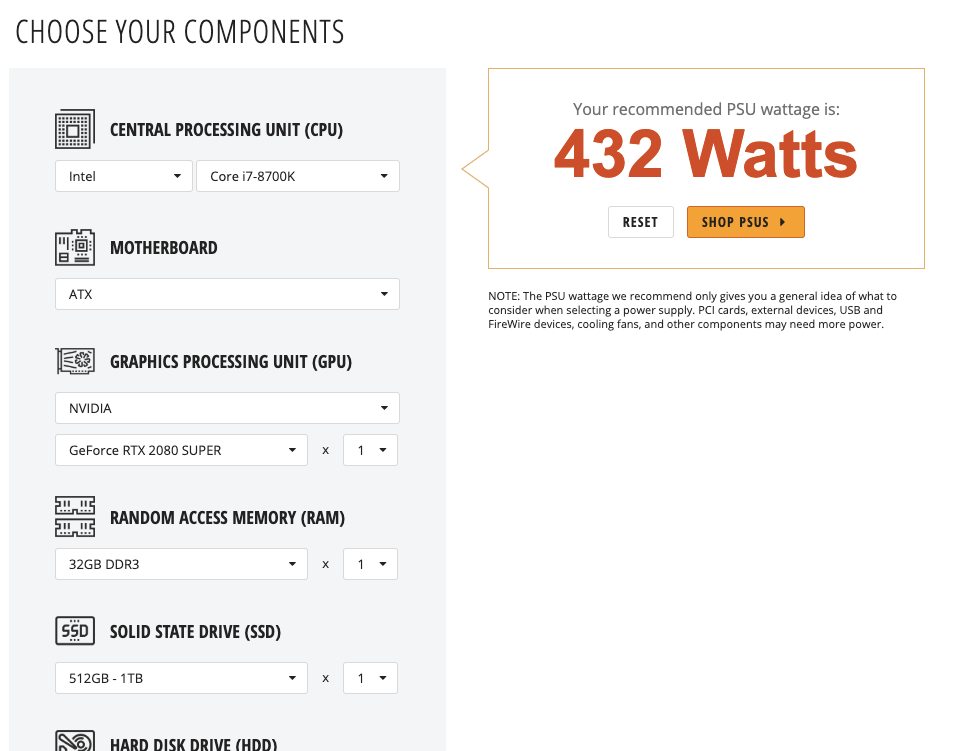
If you don’t supply enough power to the system it can cause a lot of problems. A power supply calculator will help you make sure you’re not going over; just punch in the names of your components and the calculator does the rest.
Many CPUs come with their own heat sink and fan, but if you’re going to be doing a lot of gaming you may want something cooler. A simple fan cooler will do most of the heavy lifting and keep that processor cool even when you’re in the middle of a CPU-heavy game.
Water or oil cooling are options as well, but for a basic build it’s not worth it. Water cooling is a whole different ball game, and unless you’re buying an all-in-one unit there’s a good chance you’ll spring a leak somewhere down the line. Water doesn’t mix well with computer parts. Only deal with water cooling if you really know what you’re doing.
You may consider an extra fan or two if you have the slots for them, as well. The cooler your PC, the better it will run. Just make sure you order the right size and you have enough slots on the motherboard to power them.
A good monitor, mouse and keyboard will help you with your gaming experience as well. Personal preference matters for this, but you’ll generally want a monitor that can do 1080p and go up from there depending on how good the rest of your system is.
After choosing your parts it’s time to get to the actual build.
The Building Process
When you start the setup for your build, lay out all your components ready to go on your workspace along with your case and clip up the antistatic wristband, if you have one.
Processor
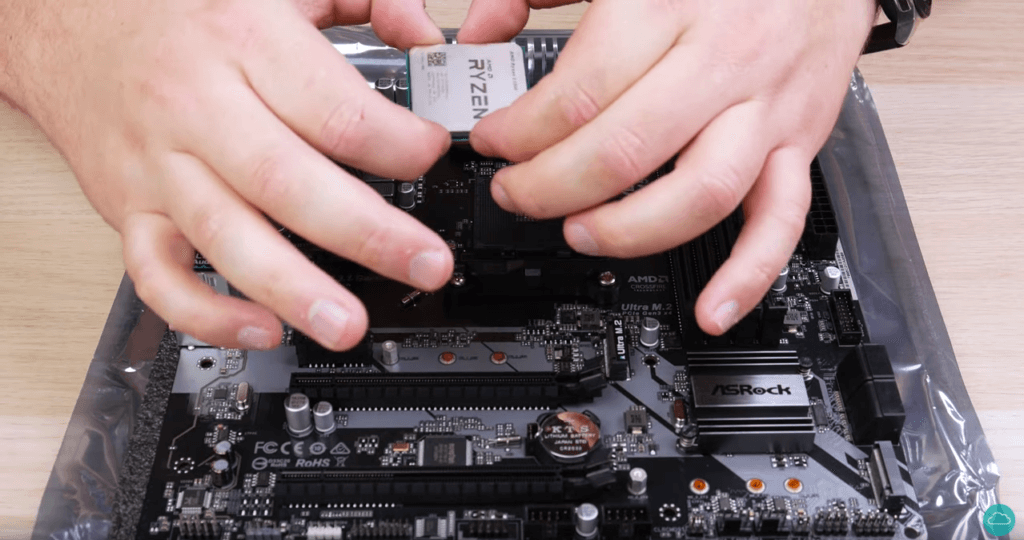
The first thing you’re going to want to do is install the CPU on the motherboard. Lay the motherboard on a flat surface with the CPU socket facing up. Pull the lever to the side of that socket up, which will open the slots for the pins.
There will be a golden triangle on one corner of the CPU. Match that with the socket, then insert the CPU. You’ll then close the lever. A lot of times it may feel like you’re putting too much pressure on, but that’s normal. The CPU will lock in.
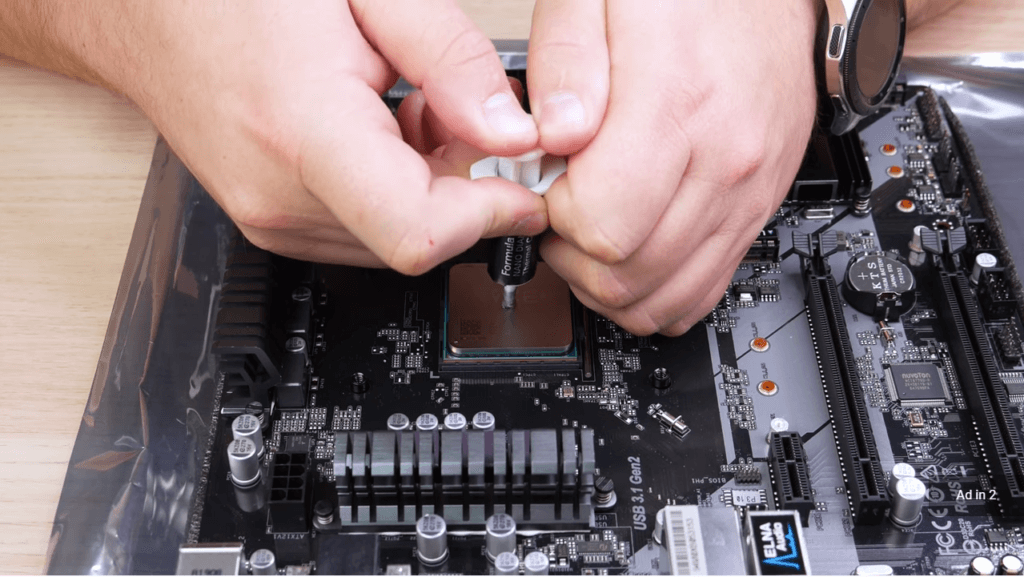
If you’re installing an aftermarket PC cooler, your install may look a little different, but for most the CPU cooler install is pretty simple. You can apply some better CPU cooler compound if you have it (the sticky paste on the install), but most CPUs will have some already.
Set the cooler on top and lock it in on top of the CPU. This process will look slightly different for each. Check the manual if you aren’t sure.
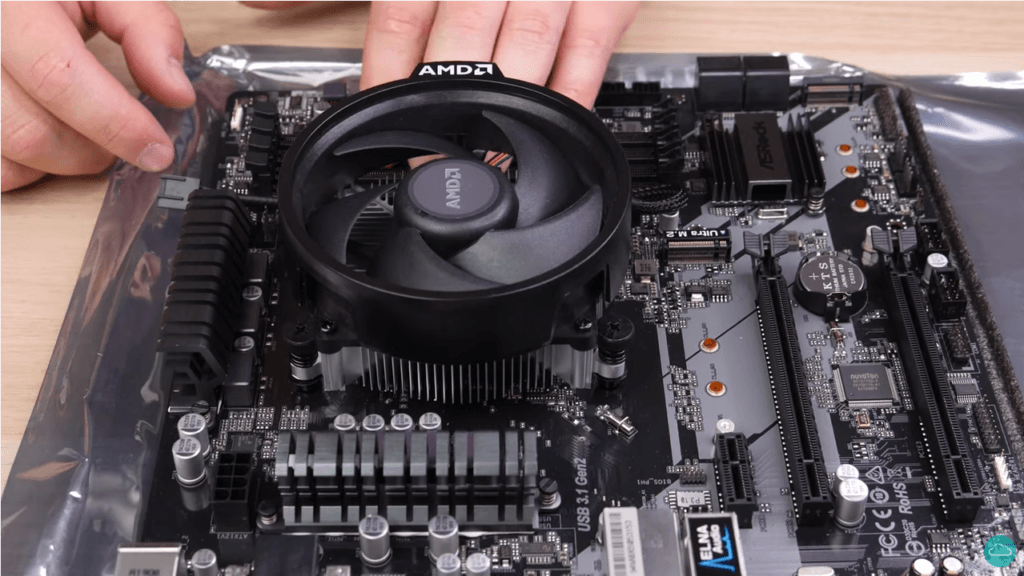
After the processor is installed on the motherboard, it’s time to continue with installing the next component: the RAM.
RAM
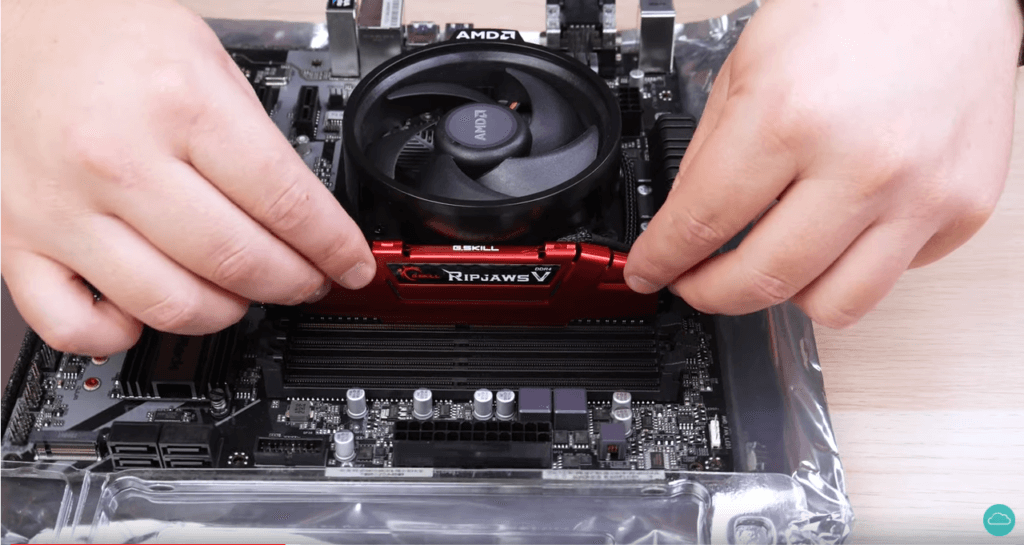
You’ll see a row of parallel slots with little clips on the end on the motherboard. That’s where your RAM goes. Open the two little clips at the end of the RAM slots and push the RAM sticks in, matching the notch on the stick to the notch in the slot. KEEP YOURSELF GROUNDED. Don’t touch the gold contacts, as this is a very easy component to destroy with electrostatic discharge.
As you push down, the clips will come back together and lock the RAM in place. Once they’re locked, you’re set.
Installing Motherboard in Case
Now it’s time to put the motherboard in place inside your case. To do this, you’ll first find the metal strip in your motherboard box, called the I/O shield. It will match the connections on the motherboard’s back side.
Place the I/O shield on the back of the PC and snap it into place.
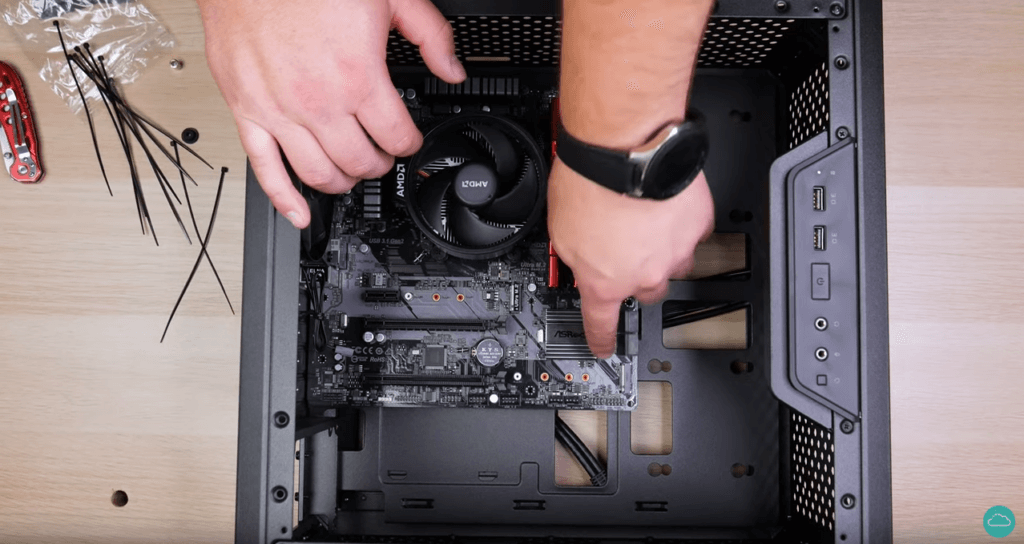
Next, you’ll want to check that the standoff posts inside the case are in the right place for your motherboard. There are small posts that screw in to the case. These need to be in the correct spots for your motherboard size. Consult the manual if you aren’t sure.
Once the posts are in the right place, set the motherboard down on top of them and screw it in. You’ll need to use a little force to mate it to the I/O shield. Be very careful not to scratch or scuff the bottom of the motherboard on the posts or the inside of the case.
Cables
Your case will have a bundle of cables that need to be routed carefully to where they go. Consult your manual for these, particularly the power and reset pins.
PSU
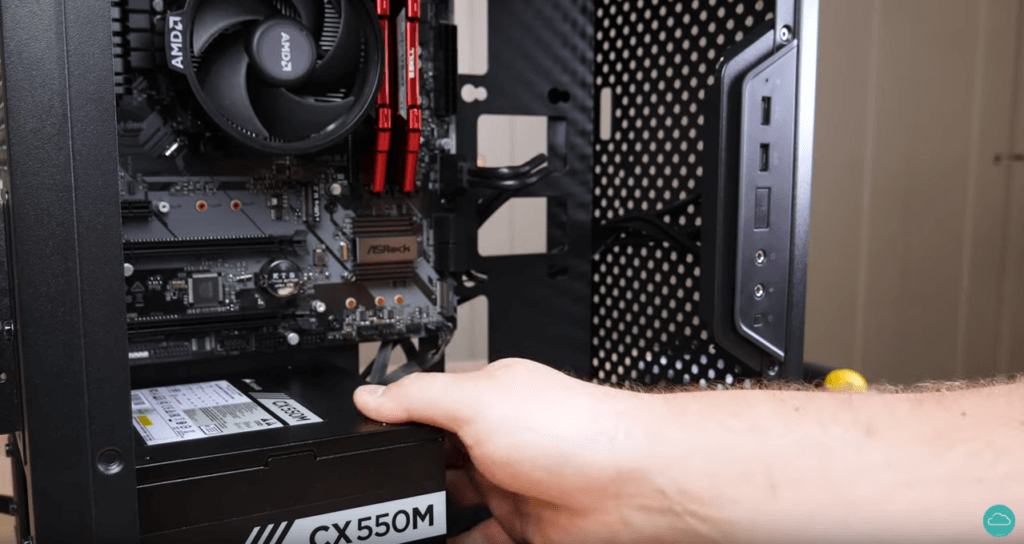
Now it’s time to install the power supply. Find the cables that you’ll need for the inside components such as your SSD, any optical drives, your graphics card and your motherboard power. Connect them first before you put the power supply in. It can be cramped inside the case.
Put the power supply in place inside the case and screw it into place. Now is the time to do a little cable management. Make sure all your cables are running to the places they need to go, and that they’re out of the way for the rest of the build steps. It’s going to get tight on space in a hurry, especially in smaller cases.
Drives
Your drives, including hard drives and any optical media drives, can be mounted in various places inside the case. Most of the time there’ll be a cage near the front that holds several drive bays. Screw them in to their slots in the cage and connect the SATA power and data cables. Choose the angle that makes sense for your connectors. Some will probably be 90°, others straight, and the less pressure you put on your connections the better.
Fans
Your case may come with a couple of fans already—consult your manual to find out where they go. If you added extra fans, you can install these at this point to. Find the proper header to plug them into on the motherboard by consulting the motherboard manual.
Graphics Card
The graphics card often comes last in the build, because it blocks access to a lot of other stuff. Find the PCI Express card slot on your motherboard. It should match your graphics card’s connector. Some may have a clip you have to open, and you’ll need to remove a metal blank or two on the back side of the case.
Remove any protective cover on the contacts, avoiding contact with them. Then press the graphics card into place until it clicks in like the RAM did. Screw it into place in its slot on the back of the case. Install the power cable, making sure it’s firmly seated.
Extra Cards
If you have an extra card like a network adapter, plug it in the same way as the graphics card. These extra cards usually won’t need a power adapter.
Testing and Install
Keep the case open for now. Plug the computer into the wall. Press the power button and listen for the fans or any motherboard tones. If everything powers up as planned, you’ve passed the build test.
If not, check to make sure that everything is plugged in, then check to make sure the switch on the back of the PSU is turned on. Check the power switch header as well to make sure the power switch on your case is getting signal to the PSU.
Finally, you can close up the case, plug in your monitor, keyboard and mouse, and begin installing Windows. We have an excellent guide to installing Windows 10 OS from a flash drive, and if you install from a disk all you have to do is change what boot device you point to.
Congratulations! You’ve built your gaming PC.
If you’ve done everything correctly you’ll have a machine that can handle just about anything you can throw at it. At this point your build is done. You can get into more complicated builds in the future, including overclocking, liquid cooling and more, but the fundamentals are there. You can install any future components in much the same way you did here.
Some upgrades you might consider down the line would be better cooling for your CPU, more fans, or possibly a bigger graphics card. If you want to upgrade your CPU, you may or may not be able to use the same board, as not all processors socket to the same motherboards. Check first before you buy.
With a fresh copy of your operating system installed, a good monitor, keyboard and mouse, and all the high-quality components you just put together, you’re set for all the gaming you could ever want to do. At least, for the next couple of years. But when this system gets outdated, you’re ready to build the next one.If you need a hand with your build, reach out to HelpCloud Technicians for remote support and we’ll do what we can to help you. We’ve been working with computers for a long time on both hardware and software and we know what we’re doing when it comes to both.

